Open in Colab: https://colab.research.google.com/github/casangi/casadocs/blob/master/docs/notebooks/usingcasa.ipynb
Using CASA
Configuring CASA
CASA provides a number of configuration settings that you should review prior to starting CASA. Users may change defaults with a configuration file (default location: $HOME/.casa/config.py) and/or by setting command line options, with the later taking precedence over the configuration file. Please reference the casaconfig API for detailed information on these configuration options.
ATTENTION: CASA versions >=6.6.4 require the configuration of CASA’s new external data handling system prior to starting CASA for the first time.
Most users who have installed CASA on their own computer will simply need to run mkdir ~/.casa/data and then re-start CASA. This will give CASA permission to install ~1 GB of data at this location. CASA will automatically keep this data up to date and share it with other current and future CASA releases.
Additional information is available in the External Data section.
Starting CASA
CASA packages installed through pip may be imported in to the standard Python environment on the host machine. For example:
(casa6) $ python

Python 3.6.9 (default, Nov 7 2019, 10:44:02)
[[GCC 8.3.0] on linux]
Type "help", "copyright", "credits" or "license" for more information.
>>> import casatasks
>>> help(casatasks)
The ~/.casa/config.py file will be read and processed when the casatasks package is imported.
The full installation of CASA includes an IPython environment which is executed like an application. Any desired command line arguments may be included. For example:
$ ./casa6/bin/casa --logfile MyTestRun.txt --nogui
The ~/.casa/config.py file will be read and processed as the casa application executes, with the supplied command line arguments (logfile and nogui) added on top.
This environment is based upon IPython. CASA uses IPython because it provides nice command completion, comandline editing and function invocation without parenthesis. The fact that the CASA application environment is IPython based means that users can also use the IPython magic commands like %run. Users are encouraged to explore the options available with IPython, but this is outside the scope of this document. CASA only supports configuration using config.py. Some of these configuration
variable in config.py are used to configure IPython at startup time. CASA configures IPython to supply parentheses when they are omitted. For example, when sin 3 is executed IPython supplies the missing parens and invokes sin(3). CASA also turns off any output that the paren expansion would normally generate.
Users may wish to set shortcuts, links, aliases or add bin/casa to their envrionment PATH. See the documentation for your operating system.
Running User Scripts
CASA 6: modular version
The modular version of CASA behaves like a standard Python package and user scripts should include the relevant modules as they would any other python module (i.e. numpy). Executing external user scripts with modular CASA is just like any other python application. Note we recommend running in a Python venv, see the installation instructions for more information.
$ (casa6) python myscript.py param1 param2
CASA 6: all-inclusive version
Since the full CASA installation from a tar file includes its own python environment that is (typically) not called directly, alternative methods of feeding in user scripts are necessary. There are three main standard Python ways of executing external user scripts in the full installation of CASA:
-c startup parameter (see configuration instructions)
exec(open(“./filename”).read()) within the CASA Python environment
add your script to startup.py in the ~/.casa directory
In addition, an “execfile” python shortcut has been added to the full installation of CASA 6 for backwards compatibility with ALMA scriptForPI.py restore scripts. This allows running scripts with the following command:
execfile ‘filename.py’ within the CASA Python environment
The execfile command in CASA 6 has been tested and found to work in the same way as in (Python 2 based) CASA 5 with the exception that (1) the treatment of global variables has changed in Python 3, (2) only direct arguments should be used (i.e., listobs(vis=’name.ms’)), and (3) the command default(‘taskname’) no longer works with execfile (but note that direct arguments always invoke the defaults anyway). While casashell tasks (tasks run in the CASA shell environment) could be treated as scriptable in the Python 2.7/CASA 5 version of execfile, in Python 3/CASA 6 this behavior is not supported. Python replacements for execfile exist [i.e., “%run -i” or “exec(open(read…”] which provide some scripting capabilities for casashell commands, though these Python alternatives are not tested in any internal CASA regression tests.
Regarding the treatment of global variables: for execfile calls within a script which itself is run via execfile, it is necessary to add globals() as the second argument to those execfile calls in order for the nested script to know about the global variables of the calling script. For example, within a script ‘mainscript.py’, calls to another script ‘myscript.py’ should be written as follows: execfile(‘myscript.py’, globals()) .
Logging
Detailed description of the CASA logger
Logging your session
The output from CASA commands is sent to the file casa-YYYYMMDD-HHMMSS.log in your local directory, where YYYYMMDD-HHMMSS are the UT date and time when CASA was started up. New starts of CASA create new log files.

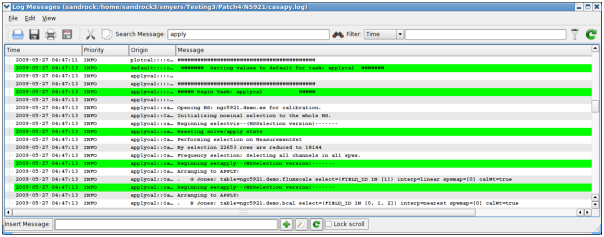
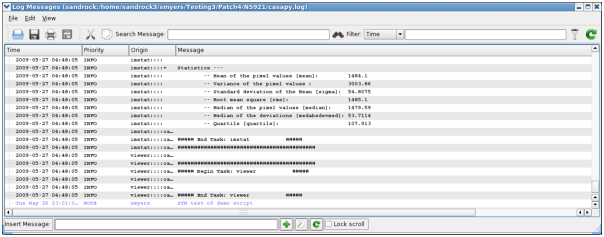
The CASA Logger GUI window under Linux. Note that under MacOSX a stripped down logger will instead appear as a Console.
The output contained in casa-YYYYMMDD-HHMMSS.log is also displayed in a separate window using the casalogger. Generally, the logger window will be brought up when CASA is started. If you do not want the logger GUI to appear, then start casa using the –nologger option,
casa --nologger
which will run CASA in the terminal window. See Starting CASA for more startup options.
ALERT: Due to problems with Qt , the GUI qtcasalogger is a different version on MacOSX and uses the Mac Console. This still has the important capabilities such as showing the messages and cut/paste. The following description is for the Linux version and thus should mostly be disregarded on OSX. On the Mac, you treat this as just another console window and use the usual mouse and hot-key actions to do what is needed.
The CASA logger window for Linux is shown in the figure above. The main feature is the display area for the log text, which is divided into columns. The columns are:
Time — the time that the message was generated. Note that this will be in local computer time (usually UT) for casa generated messages, and may be different for user generated messages;
Priority — the Priority Level (see below) of the message;
Origin — where within CASA the message came from. This is in the format Task::Tool::Method (one or more of the fields may be missing depending upon the message);
Message — the actual text.
The CASA Logger GUI window under Linux. Note that under MacOSX a stripped down logger will instead appear as a Console.

Using the casalogger Filter facility. The log output can be sorted by Priority, Time, Origin, and Message. In this example we are filtering by Origin using ‘clean’, and it now shows all the log output from the clean task.
The casalogger GUI has a range of features, which include:
Search — search messages by entering text in the Search window and clicking the search icon. The search currently just matches the exact text you type anywhere in the message.
Filter — a filter to sort by message priority, time, task/tool of origin, and message contents. Enter text in the Filter window and click the filter icon to the right of the window. Use the pull-down at the left of the Filter window to choose what to filter. The matching is for the exact text currently (no regular expressions).
View — show and hide columns (Time, Priority, Origin, Message) by checking boxes under the View menu pull-down. You can also change the font here.
Insert Message — insert additional comments as “notes” in the log. Enter the text into the “Insert Message” box at the bottom of the logger, and click on the Add (+) button, or choose to enter a longer message. The entered message will appear with a priority of “NOTE” with the Origin as your username.
Copy — left-click on a row, or click-drag a range of rows, or click at the start and shift click at the end to select. Use the Copy button or Edit menu Copy to put the selected rows into the clipboard. You can then (usually) paste this where you wish.
Open — There is an Open function in the File menu, and an Open button, that will allow you to load old casalogger files.
Alert: Messages added through Insert Message will currently not be inserted into the correct (or user controllable) order into the log. Copy does not work routinely in the current version. It is recommended to open the casa-YYYYMMDD-HHMMSS.log file in a text editor, to grab text.
CASA Logger - Insert facility: The log output can be augmented by adding notes or comments during the reduction. The file should then be saved to disk to retain these changes.
Other operations are also possible from the menu or buttons. Mouse “flyover” displays a tooltip describing the operation of buttons.
It is possible to change the name of the logging file. By default it is ‘casa-YYYYMMDD-HHMMSS.log’. But starting CASA with the option –logfile will redirect the output of the logger to the file ‘otherfile.log’ (see also Page on “Starting CASA”).
casa --logfile otherfile.log
The log file can also be changed during a CASA session. Typing:
casalog.setlogfile('otherfile.log')
will redirect the output to the ‘otherfile.log’ file. However, the logger GUI will still be monitoring the previous ‘casa-YYYYMMDD-HHMMSS.log’ file. To change it to the new file, go on File - Open and select the new log file, in our case ‘otherfile.log’.
Startup options for the logger
One can specify logger options at the startup of CASA on the command line:
casa <logger options>
The options are described in “Starting CASA”. For example, to inhibit the a GUI and send the logging messages to your terminal, do
casa --nologger --log2term
while
casa --logfile mynewlogfile.log
will start CASA with logger messages going to the file mynewlogfile.log. For no log file at all, use:
casa --nologfile
Setting priority levels in the logger
Logger messages are assigned a Priority Level when generated within CASA. The current levels of Priority are:
SEVERE — errors;
WARN — warnings;
INFO — basic information every user should be aware of or has requested;
INFO1 — information possibly helpful to the user;
INFO2 — details for advanced users;
INFO3 — continued details;
INFO4 — lowest level of non-debugging information;
DEBUG1 — most “important” debugging messages;
DEBUG2 — more details;
DEBUGGING — lowest level of debugging messages.
The “debugging” levels are intended for the developers use.
Inside the Toolkit:
The casalog tool can be used to control the logging. In particular, the casalog.filter method sets the priority threshold. This tool can also be used to change the output log file, and to post messages into the logger.
There is a threshold for which these messages are written to the casa-YYYYMMDD-HHMMSS.log file and are thus visible in the logger. By default, only messages at level INFO and above are logged. The user can change the threshold using the casalog.filter method. This takes a single string argument of the level for the threshold. The level sets the lowest priority that will be generated, and all messages of this level or higher will go into the casa-YYYYMMDD-HHMMSS.log file.
Some examples:
casalog.filter('INFO')           #the default
casalog.filter('INFO2')          #should satisfy even advanced users
casalog.filter('INFO4')          #all INFOx messages
casalog.filter('DEBUG2')         #all messages including debuggingcasalog.
WARNING: Setting the threshold to DEBUG2 will put lots of messages in the log!
Error Handling with CASA tasks
Irrecoverable errors in tasks produce exceptions in all CASA tasks. Different standard Python types of exceptions are thrown depending on the type of error, including RuntimeError, OSError, ValueError, or AssertionError (in particular when there is an error validating the input parameters). This behavior applies to all CASA tasks and has been made consistent across all tasks beginning with CASA 6.2/5.8. For a list of CASA tasks see the API section.
When using CASA tasks in their modular version (from the casatasks module), the exceptions are thrown as in normal Python functions, and can be used to handle errors in the data reduction workflow in user scripts, pipelines, etc. In earlier versions of CASA this was not consistent; see the changes section below for more details on earlier versions of CASA.
Let us see an example script that in CASA 6 produces an exception in the task split:
from casatasks import split
try:
    split(vis='uid___A002_X30a93d_X43e_small.ms', outputvis='foo.ms', datacolumn='corrected', spw='0')
except RuntimeError as exc:
    print(' * Got exception: {}'.format(exc))
The task fails and produces an exception because the requested data column is not present in the MeasurementSet. The print statement (shown here as a trivial way of handling the error, just for illustration) will print the following message:
* Got exception: Desired column (CORRECTED_DATA) not found in the input MS (/casadata/uid___A002_X30a93d_X43e_small.ms).
The following messages are also produced in the CASA log:
INFO    split::::casa   ##########################################
INFO    split::::casa   ##### Begin Task: split              #####
INFO    split::::casa   split( vis='uid___A002_X30a93d_X43e_small.ms', outputvis='foo.ms', keepmms=True, field='', spw='0', scan='', antenna='', correlation='', timerange='', intent='', array='', uvrange='', observation='', feed='', datacolumn='corrected', keepflags=True, width=1, timebin='0s', combine='' )
INFO    MSTransformManager::parseMsSpecParams   Input file name is uid___A002_X30a93d_X43e_small.ms
INFO    MSTransformManager::parseMsSpecParams   Data column is CORRECTED
INFO    MSTransformManager::parseMsSpecParams   Output file name is foo.ms
INFO    MSTransformManager::parseDataSelParams  spw selection is 0
WARN    MSTransformManager::checkDataColumnsToFill  CORRECTED_DATA column requested but not available in input MS
INFO    MSTransformManager::initDataSelectionParams Selected SPWs Ids are Axis Lengths: [1, 4]  (NB: Matrix in Row/Column order)
INFO    MSTransformManager::initDataSelectionParams+    [0, 0, 3, 1]
INFO    MSTransformManager::open    Select data
INFO    MSTransformManager::createOutputMSStructure Create output MS structure
SEVERE  split::::casa   Task split raised an exception of class RuntimeError with the following message: Desired column (CORRECTED_DATA) not found in the input MS (/casadata/uid___A002_X30a93d_X43e_small.ms).
INFO    split::::casa   Task split complete. Start time: 2020-11-02 14:33:58.083124 End time: 2020-11-02 14:33:58.262353
INFO    split::::casa   ##### End Task: split                #####
INFO    split::::casa   ##########################################
CASA 6 - casashell (monolithic) version of tasks
When starting CASA in its full installation variant, using the bin/casa command, a version of the CASA tasks meant for interactive use in the CASA IPython prompt is automatically imported. These interactive or casashell versions of the CASA tasks (see casashell) support, for example, the inp/go commands. The behavior of these casashell tasks in terms of error handling is intentionally different from the behavior of the modular version of the tasks, as explained
below. Note that this doesn’t imply that the modular tasks behavior cannot be obtained when using the full installation. The modular version of a task can be imported by simply importing the task explicitly from casatasks.
The casashell versions of the tasks do not throw exceptions. Instead, they return False if an exception occurs within the task. The exception traceback is printed to the CASA log, but the execution of the task finishes without throwing the exception. The casashell infrastructure captures the exceptions that occur inside a task and turn any exception into a return value False. For example, if we use the same split command from the previous section in the CASA prompt, which fails because a
non-existent data column is requested, the split call will return False and the log will show the following messages:
CASA <1>: split(vis='uid___A002_X30a93d_X43e_small.ms', outputvis='foo.ms', datacolumn='corrected', spw='0')
INFO    split::::casa   ##########################################
INFO    split::::casa   ##### Begin Task: split              #####
INFO    split::::casa   split( vis='uid___A002_X30a93d_X43e_small.ms', outputvis='foo.ms', keepmms=True, field='', spw='0', scan='', antenna='', correlation='', timerange='', intent='', array='', uvrange='', observation='', feed='', datacolumn='corrected', keepflags=True, width=1, timebin='0s', combine='' )
INFO    MSTransformManager::parseMsSpecParams   Input file name is uid___A002_X30a93d_X43e_small.ms
INFO    MSTransformManager::parseMsSpecParams   Data column is CORRECTED
INFO    MSTransformManager::parseMsSpecParams   Output file name is foo.ms
INFO    MSTransformManager::parseDataSelParams  spw selection is 0
WARN    MSTransformManager::checkDataColumnsToFill  CORRECTED_DATA column requested but not available in input MS
INFO    MSTransformManager::initDataSelectionParams Selected SPWs Ids are Axis Lengths: [1, 4]  (NB: Matrix in Row/Column order)
INFO    MSTransformManager::initDataSelectionParams+    [0, 0, 3, 1]
INFO    MSTransformManager::open    Select data
INFO    MSTransformManager::createOutputMSStructure Create output MS structure
SEVERE  split::::casa   Task split raised an exception of class RuntimeError with the following message: Desired column (CORRECTED_DATA) not found in the input MS (/casadata/uid___A002_X30a93d_X43e_small.ms).
INFO    split::::casa   Task split complete. Start time: 2020-11-02 18:27:59.105823 End time: 2020-11-02 18:27:59.316335
INFO    split::::casa   ##### End Task: split                #####
INFO    split::::casa   ##########################################
SEVERE  split::::casa   Exception Reported: Error in split: Desired column (CORRECTED_DATA) not found in the input MS (/casadata/uid___A002_X30a93d_X43e_small.ms).
INFO    split::::casa   Traceback (most recent call last):
INFO    split::::casa+    File "/scratch/casa-6.2.0-36/lib/py/lib/python3.6/site-packages/casashell/private/split.py", line 723, in __call__
INFO    split::::casa+      _return_result_ = _split_t( _invocation_parameters['vis'],_invocation_parameters['outputvis'],_invocation_parameters['keepmms'],_invocation_parameters['field'],_invocation_parameters['spw'],_invocation_parameters['scan'],_invocation_parameters['antenna'],_invocation_parameters['correlation'],_invocation_parameters['timerange'],_invocation_parameters['intent'],_invocation_parameters['array'],_invocation_parameters['uvrange'],_invocation_parameters['observation'],_invocation_parameters['feed'],_invocation_parameters['datacolumn'],_invocation_parameters['keepflags'],_invocation_parameters['width'],_invocation_parameters['timebin'],_invocation_parameters['combine'] )
INFO    split::::casa+    File "/scratch/casa-6.2.0-36/lib/py/lib/python3.6/site-packages/casatasks/split.py", line 258, in __call__
INFO    split::::casa+      task_result = _split_t( _pc.document['vis'], _pc.document['outputvis'], _pc.document['keepmms'], _pc.document['field'], _pc.document['spw'], _pc.document['scan'], _pc.document['antenna'], _pc.document['correlation'], _pc.document['timerange'], _pc.document['intent'], _pc.document['array'], _pc.document['uvrange'], _pc.document['observation'], _pc.document['feed'], _pc.document['datacolumn'], _pc.document['keepflags'], _pc.document['width'], _pc.document['timebin'], _pc.document['combine'] )
INFO    split::::casa+    File "/scratch/casa-6.2.0-36/lib/py/lib/python3.6/site-packages/casatasks/private/task_split.py", line 163, in split
INFO    split::::casa+      mtlocal.open()
INFO    split::::casa+    File "/scratch/casa-6.2.0-36/lib/py/lib/python3.6/site-packages/casatools/mstransformer.py", line 43, in open
INFO    split::::casa+      return self._swigobj.open()
INFO    split::::casa+    File "/scratch/casa-6.2.0-36/lib/py/lib/python3.6/site-packages/casatools/__casac__/mstransformer.py", line 176, in open
INFO    split::::casa+      return _mstransformer.mstransformer_open(self)
INFO    split::::casa+  RuntimeError: Desired column (CORRECTED_DATA) not found in the input MS (/casadata/uid___A002_X30a93d_X43e_small.ms).
Out[1]: False
(in this example listing we show what would be printed to the terminal when the CASA log messages are printed to the terminal, using the --log2term command line option).
In CASA 5, by default tasks never threw exceptions. See an earlier version of CASA Docs for details.
Standardized behavior since CASA 6.2
The behavior of tasks with respect to errors, exceptions, and return values in case of error has been standardized since CASA 6.2. In CASA 6.x, this standardization applies only to CASA tasks when imported from casatasks. The casashell versions that come with casashell (CASA IPython prompt) keep the same behavior: they never throw exceptions and instead return False in case of a serious error (exception in the task). This is ensured by the casashell infrastructure (casashell task wrappers)
that will never let an exception out.
The changes introduced are:
All tasks throw exceptions as normal Python functions (the one or more top level try/except blocks that would trap all exceptions in 1/3+ of tasks have been removed or replaced in favor of finally blocks that clean up tools, etc. resources, see documentation on Python clean-up actions and the finally clause.
Exception types are more specific, using different Python built-in exceptions and avoiding the overly generic ‘Exception’ type as much as possible.
The message when there is an exception in a task is the same for all tasks, is printed to the CASA log and reads, for example, like this: “Task <mstransform> raised an exception of class <RuntimeError> with the following message: Desired column (CORRECTED_DATA) not found in the input MS (/casadata/uid___X02_X3d737_X1_01_small.ms)”
The same behavior when there are errors in HISTORY updates is ensured across all CASA tasks: produce a warning message but don’t change the task return/exceptions.
The situation before/after these changes can be summarized as follows:
In CASA releases earlier than 6.2/5.8, some tasks would raise exceptions, but other tasks would never raise exceptions. Instead, they would trap any exceptions raised in the task and return different values representing unsuccessful execution, such as False, None, or {}. To know whether exceptions were raised or something else returned (and what particular something else was returned), one would need to look into the task code, as this was undocumented behavior and there was no clear pattern to explain the different behavior of different tasks.
Beginning in CASA 6.2, all CASA tasks raise exceptions in the event of an unrecoverable error, as they would be raised by normal Python functions. Client code using CASA tasks can assume all tasks raise exceptions in case of error and devise a consistent error handling approach when using CASA tasks.
The following list summarizes the tasks which will raise exceptions after CASA 6.2/5.8 but did not raise exceptions in earlier versions of CASA:
from casatasks: clearcal, clearstat, cvel2, delmod, fixplanets, fixvis, flagdata, hanningsmooth, imhead, importasdm, importatca, importgmrt, importmiriad, importuvfits, imregrid, imsmooth, initweights, listcal, listfits, listhistory, listobs, listpartition, listvis, mstransform, nrobeamaverage, partition, plotants, sdpolaverage, sdtimeaverage, setjy, specfit, split, spxfit, uvsub, vishead
from casaplotms: plotms
The impact on scripts that use these tasks is that errors will now be more visible, with an exception raised rather than a probably silent and ambiguous False or None or {} return. Note that scripts that do not import tasks explicitly from casatasks are implicitly using the casashell version of the tasks. These scripts would not see any behavior changes, as in their case the casashell tasks never throw exceptions. In scripts that use tasks from casatasks and were not checking
the return value of tasks (for example for a False or {} value), potential failures in tasks would remain potentially hidden in the code flow, before CASA 6.2/5.8 (and maybe unnoticed). From CASA 6.2/5.8 onward, a failure in a task will raise an exception. Scripts can implement error handling to react to exceptions from tasks by using the try clause of Python.
Information Collection
The Telemetry and Crash Reporter functionality was removed in CASA 6.6.0.
Hardware Requirements
Recommended CASA computing environments
The recommended Hardware requirements are provided here as part of the CASA webpages.